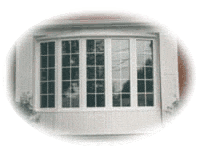
Vinyl windows have only recently been considered the best option for window replacements. The construction industry has advanced and developed new, more efficient materials for windows than the traditional wooden frames.
Vinyl windows have multiple benefits – they greatly excel over their metal and wooden counterparts for home installations. Metals commonly used for windows, such as aluminum and steel, are excellent heat conductors. This property may be useful in other areas of construction, but obviously not very good for trapping heat inside the home.
Vinyl on the other hand acts as an insulator, and is extremely energy efficient for window frames. This is due to the fact they’re manufactured with an air pocket in their centre, which insulates the building. It is made up of various internal sections that serve the dual purpose of trapping air and enhancing the strength of the structure. Vinyl is also perfectly designed for allowing hardly any air to pass between the gaps, and this is a major aspect to consider when trying to insulate your home.
Installation of the windows- although it may appear daunting, vinyl window fitting is not as complex as it may seem. It can be a one-man job just by following the basic instructions, along with the correct equipment and materials to hand.
1. Before you even order your windows, the first important step to consider is getting an accurate and precise measurement of your existing windows. Replacement vinyl windows are bespoke designed for your window opening, and if they don’t fit (due to mis-measurement) then there’s no taking them back. Vitally important are the jamb to jamb measurements from all three areas- bottom, top and middle sections of the old window. No two windows in your property are the same size, so be sure to get careful measurements for each one individually.
2. Remove the existing window frame which should have inner and outer stops. Remove the inner one first, and the outer one second.
3. Place the new vinyl window into the space where the old one was. You are looking for a snug fit here, with minimal space around the edges if you measured properly. However, if there are some spaces at the sides, then just fill these with an adequate amount of filler to prevent air escaping from the installment.
4. Once the window has been fit securely into place, you should try to open it gently to check if everything is functioning correctly. It may be a little stiff the first time, so be careful as you do this- everything may not be fully secured.
5. When you’re satisfied that it’s all functioning properly, you can begin to make it a solid fixture by inserting the screws. They should be placed in parts of the window that will not be visible from the inside or outside, and definitely should not poke out of the vinyl.
Always take the necessary safety precautions when doing the window installation yourself or as a team. You need the right clothing to protect you if the glass smashes or if the window falls from a height. Having said this, replacing an old window with a vinyl one is usually a straightforward process when you follow given instructions.

